Replacing broken window glass is one of those home repairs that feels intimidating at first glance. There’s the fragility of the material, the risk of injury, and the uncertainty of getting everything to fit just right. Yet, with a steady approach and a bit of patience, it becomes a manageable—and even satisfying—task.
A cracked or shattered pane doesn’t just affect how a space looks. It disrupts insulation, lets in unwanted noise, and can make a room feel unfinished. Taking the time to fix it properly restores both function and comfort.
Understanding the Nature of Broken Glass
Before jumping into the process of replacing broken window glass, it helps to pause and observe what kind of damage you’re dealing with. Not all broken glass behaves the same way. Some panes fracture into large, jagged pieces, while others crumble into small, granular fragments.
Older single-pane windows tend to break into sharp shards that cling to the frame. Modern tempered glass, on the other hand, shatters into smaller, less dangerous pieces. Knowing this affects how you approach removal—and how cautious you need to be.
It’s also worth noticing whether the break is isolated or part of a larger issue. A sudden impact might be the cause, but sometimes cracks appear due to temperature changes or subtle frame movement. Recognizing the reason can help prevent future problems.
Preparing the Workspace with Care
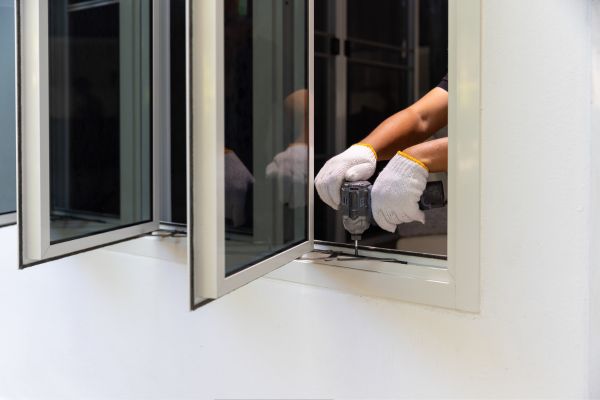
Replacing broken window glass isn’t just about tools; it’s about creating a safe and controlled environment. Start by clearing the area around the window. Furniture, curtains, and anything delicate should be moved out of reach.
Safety comes first here, naturally. Thick gloves, eye protection, and closed shoes are not optional. Broken glass has a way of finding exposed skin, often when you least expect it.
Lay down a cloth or sheet beneath the window to catch falling pieces. It’s a small step, but it makes cleanup much easier and prevents tiny shards from spreading across the floor.
Removing the Damaged Glass
The removal stage requires patience more than force. Begin by gently loosening any remaining pieces. Larger shards can often be lifted out carefully by hand, while smaller fragments may need to be coaxed out using pliers.
If the window is held in place by putty or glazing compound, you’ll need to soften or chip it away. This part can feel tedious, but rushing it often leads to splintered wood or damaged frames.
As the glass comes away, you’ll likely uncover small metal points or clips that held it in place. These should be removed as well, leaving a clean and open frame ready for the new pane.
There’s something oddly satisfying about this stage. The mess is gradually cleared, and the window begins to feel like a blank canvas again.
Cleaning and Preparing the Frame
With the broken glass gone, attention shifts to the frame itself. This step is easy to overlook, but it plays a crucial role in how well the new glass fits and holds over time.
Old putty, dust, and debris should be thoroughly cleaned out. A chisel or scraper works well for this, as long as it’s used gently. The goal isn’t to strip the frame down completely but to create a smooth, even surface.
If the frame shows signs of wear—cracks, soft spots, or peeling paint—it’s worth addressing them now. A quick sanding or minor repair can make a significant difference in the final result.
Sometimes, this stage reveals more than expected. What seemed like a simple glass replacement turns into a quiet moment of restoring the structure around it.
Measuring with Precision
Accurate measurement is where the success of replacing broken window glass truly begins. Even a slight miscalculation can lead to gaps, stress on the glass, or difficulty during installation.
Measure the opening carefully, both width and height, and then subtract a small margin—usually a few millimeters—to allow for expansion and ease of fitting. Glass should sit comfortably within the frame, not tightly forced into place.
It’s a simple principle, but one that makes all the difference. A well-measured pane feels right as soon as it’s placed, almost as if it belongs there naturally.
Choosing the Right Replacement Glass
Not all glass is created equal, and the choice you make affects durability, safety, and insulation. Clear float glass is common for standard windows, while laminated or tempered glass offers added strength and security.
There’s also the question of thickness. Matching the original pane is usually the safest option, as it ensures compatibility with the frame and existing hardware.
Sometimes, replacing broken window glass becomes an opportunity to upgrade. A slightly stronger or more energy-efficient option can subtly improve the space without changing its character.
Installing the New Pane
Placing the new glass into the frame is a moment that requires both care and confidence. Start by applying a thin layer of glazing compound or putty along the inner edge of the frame. This acts as a cushion and seal.
Gently position the glass into place, pressing it lightly so it sits evenly. It shouldn’t wobble or feel unstable. If it does, adjustments are needed before moving forward.
Once the pane is seated, small glazing points or clips are inserted to hold it securely. These are discreet but essential, providing the structural support that keeps the glass from shifting.
Another layer of putty is then applied along the edges, sealing the glass and creating a clean finish. This part can feel almost artistic, smoothing the compound into a neat, continuous line.
Allowing Time for the Finish to Set
After installation, patience comes back into play. The glazing compound needs time to cure and harden, forming a durable seal around the glass.
During this period, it’s best to avoid disturbing the window. Even light pressure can affect how the putty sets, leading to uneven edges or weak spots.
Once cured, the putty can be painted if desired, blending the repair seamlessly into the surrounding frame. It’s a subtle transformation, but one that brings everything together.
Noticing the Difference
There’s a quiet satisfaction in stepping back and seeing the finished result. The window looks whole again, but more than that, it feels restored. Light passes through clearly, drafts are gone, and the space regains its sense of completeness.
Replacing broken window glass isn’t just about fixing damage. It’s about restoring balance—between inside and outside, between function and appearance.
When the Task Feels Bigger Than Expected
Sometimes, what starts as a straightforward repair reveals deeper issues. Warped frames, recurring cracks, or structural concerns can make the process more complex.
In those moments, it’s worth acknowledging the limits of a simple fix. Addressing underlying problems ensures that the effort put into replacing broken window glass isn’t undone by hidden flaws.
There’s no harm in taking a step back, reassessing, and approaching the repair with a broader perspective.
A Final Reflection on Repair and Renewal
Replacing broken window glass is one of those tasks that quietly changes how a space feels. It’s not dramatic, but it’s meaningful. A once-damaged window becomes clear again, letting light in without interruption.
What begins as a necessary repair often turns into something more reflective. It’s a reminder that small fixes can have a lasting impact, restoring not just structure, but a sense of comfort and care within a home.
And perhaps that’s the real value of it—not just the glass itself, but the act of bringing something back to life, piece by careful piece.